I am also thrilled that I have several new followers because of the reveal. Thanks for following. I don't post as much as I should right now, but things are changing with my work schedule and I will be able to blog more frequently here soon. With this change, I will be starting 2 other blogs as well. When those blogs are up and running, you guys will be the first to know about them.
Hopefully this weekend, I will be able to finish up the bedroom and be able to do a bedroom reveal and have some tutorial posts. So stay tuned for all that.
Now onto this chandelier.
I need to start off by saying that I am still new to blogging and it is still hard for me to remember that I need to take more pictures of projects as they are happening. With that said, I don't have any pictures of the chandelier steps. I apologize, but this is a really simple project. Most of the projects I do are very simple. Complicated projects aren't my thing.
I started out with this wreath form from Hobby Lobby.

Then I spray painted it white.
I purchased 30 feet of clear octagon acrylic bead strands at shopwildthings. They look like this.

I also purchased these crystal acrylic pendants from shopwildthings.

"Bijou"
I decided to alternate between 2 different lengths of strands for the chandelier. I went with strands of 5 beads and a pendant and 7 beads and a pendant.
Attach each strand to the wreath form. The time consuming part is just attaching them to the form. I didn't have anything to hang the form onto. It would have probably been easier to have it hanging on another light fixture or something. I was just sitting on the floor attaching each strand until it was completely full.
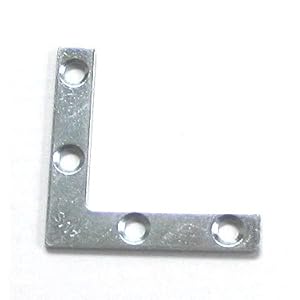
Finally, we removed the glass shade that was on our old crappy light fixture. (I tried to find a picture of this type of light fixture with no luck, lesson learned on taking the appropriate pictures for a tutorial) My husband came up with some way to attach the form to the light fixture with brackets that look like this.

Here is a shot from underneath the light fixture. It is a better way of seeing how the wreath form is attached with the brackets.
That is it. Very easy. I think it looks pretty good and it cost less than $50.
I promise all the rest of my tutorials will have pictures of the steps. Thanks again to all my new followers and be on the look out for the bedroom reveal here soon.
Until next time...


This is awesome Lauren and so easy!!!!
ReplyDeleteThanks for the tutorial Lauren. Looking forward to the bedroom reveal.
ReplyDeleteTuula :)
Absolutely gorgeous!!!!!
ReplyDelete